
Why Regular Deck Inspections Matter for Connecticut Homeowners
A thorough inspection can save you thousands in repairs and keep your outdoor space safe for years to come.
Why Catching Decay Early Saves Thousands in Repairs
Wood rot poses one of the most serious threats to the structural integrity of outdoor living spaces. When moisture penetrates wood fibers, it creates an environment where fungi thrive, breaking down the cellular structure of the lumber. In Connecticut, where humidity levels remain elevated from spring through fall and winter freeze-thaw cycles accelerate decay, even pressure-treated lumber can succumb to rot within five to ten years if moisture barriers fail or drainage systems underperform.
The financial implications of undetected rot extend far beyond cosmetic concerns. A single compromised joist or post can jeopardize the safety of an entire structure, potentially leading to collapses that cause injury and property damage. Homeowners who conduct biannual inspections typically catch decay in its earliest stages, when localized repairs cost hundreds rather than thousands. Waiting until visible sagging or soft spots appear often means that hidden damage has already spread to framing members, ledger boards, or support posts.
Beyond immediate safety risks, rot also diminishes property value and curb appeal. Prospective buyers and home inspectors scrutinize outdoor structures closely, and evidence of decay signals neglect that can derail sales or reduce offers. Regular inspection habits protect your investment and ensure that your outdoor space remains a functional, attractive extension of your home for decades to come.
Gathering the Right Equipment Before You Begin
Before beginning your inspection, assemble the right tools to ensure thorough assessment. You will need a flat-head screwdriver or awl for probing suspected soft spots, a flashlight or headlamp for examining shadowed areas beneath the structure, and a moisture meter if you want quantitative readings. A digital camera or smartphone helps document findings for future reference or when consulting with deck builders about repairs. Wear sturdy gloves to protect your hands from splinters and potential mold exposure.
Schedule your inspection during dry weather, ideally in late spring or early fall when Connecticut’s humidity levels are moderate but moisture-related damage from winter or summer remains visible. Avoid inspecting immediately after heavy rain, as surface wetness can obscure underlying issues and make it difficult to differentiate between temporary dampness and chronic moisture retention. Morning light provides the best visibility for spotting discoloration and surface irregularities.
Create a simple checklist that covers all structural components: decking boards, joists, beams, posts, ledger boards, railings, balusters, stair treads, and flashing. Work systematically from one end of the structure to the other, inspecting both top surfaces and underside framing. Taking notes as you progress ensures that you do not overlook any area and provides a baseline for comparison during future inspections.
Step-by-Step Methods for Detecting Hidden Damage
Begin with a visual survey of all exposed surfaces. Look for discoloration, particularly dark streaks, green or black staining, or grayish patches that indicate mold or mildew growth. Check for warping, cupping, or splitting in deck boards, as these deformities often signal moisture infiltration. Pay close attention to any areas where water pools after rain or where debris accumulates, since standing moisture accelerates decay.
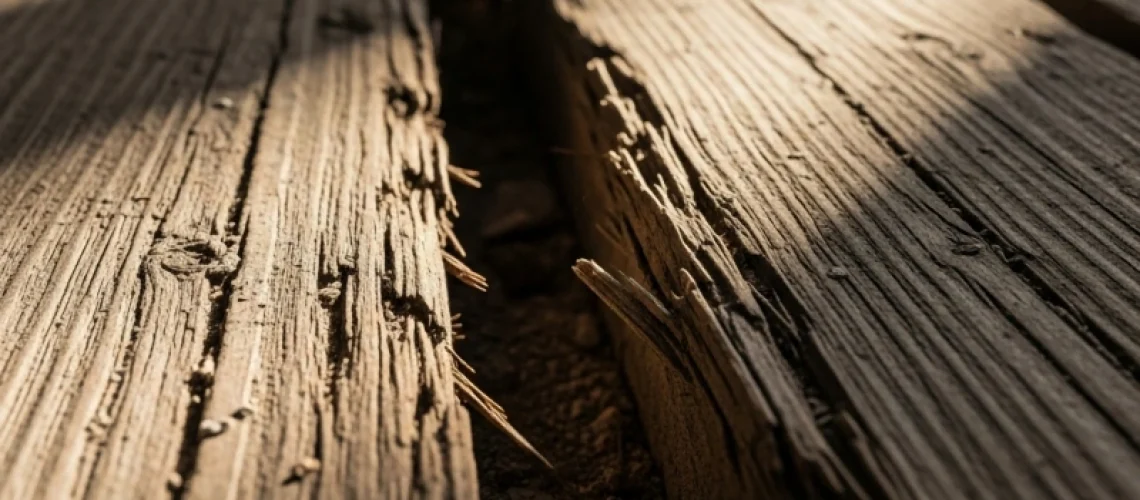
Next, conduct tactile tests by walking across the entire surface and feeling for soft or spongy areas underfoot. Press down firmly on boards near support posts, railings, and stair connections. Use your screwdriver or awl to probe any suspicious spots by inserting the tip into the wood grain. Healthy lumber resists penetration, while rotted wood allows the tool to sink in easily, sometimes crumbling or flaking away. Test the ends of deck boards where moisture tends to collect, as well as any areas in contact with soil or planters.
Inspect the underside of the structure by accessing the space beneath the deck. Examine joists and beams for sagging, cracking, or soft spots. Check the ledger board where the deck attaches to your home, looking for gaps, rust stains from corroded fasteners, or dark streaks that suggest water intrusion. In Durham and throughout central Connecticut, homes often feature decks built with standard southern yellow pine or cedar, both of which show early signs of rot through color changes and texture softening long before structural failure occurs.
Finally, examine all metal hardware, including joist hangers, bolts, and lag screws. Rust or corrosion around fasteners often accompanies wood rot, as moisture that degrades metal also feeds fungal growth. Loose or missing fasteners may indicate that surrounding wood has deteriorated to the point where it can no longer hold hardware securely.
Understanding Wood Rot in Decks
Certain zones on any deck are inherently more vulnerable to moisture retention and fungal growth. Railing posts, especially those set directly into the deck surface or mounted with base plates, trap water at connection points and often show rot first. The joint where balusters meet horizontal rails also collects debris and moisture, making it a frequent trouble spot. Inspect these areas carefully, probing around fasteners and checking for gaps or cracks that allow water infiltration.
Deck boards located in shaded areas or beneath overhangs dry more slowly after rain and remain damp longer during Connecticut’s humid summers. Boards that rest directly against the house or other vertical surfaces also trap moisture and limit airflow, accelerating decay. Stair stringers and treads endure constant foot traffic and exposure to the elements, making them particularly susceptible to wear and rot. Check the top edges and underside of each tread, as well as the points where stringers attach to the main deck structure.
Flashing installed where the ledger board meets the house represents a critical line of defense against water intrusion. If flashing is missing, improperly installed, or corroded, water will seep behind the ledger and into both the deck framing and your home’s exterior wall. This hidden moisture pocket can cause extensive rot in both structures before any surface symptoms appear. Inspect flashing seams and fasteners closely, and look for any signs of water staining on the house siding above the ledger.
If your inspection reveals soft wood, extensive discoloration, or structural instability in any of these high-risk zones, consider consulting with experienced deck contractors who can evaluate the extent of damage and recommend targeted repairs or complete reconstruction. For homeowners weighing long-term durability, composite decking options eliminate wood rot concerns entirely while maintaining the aesthetic appeal of traditional lumber. Addressing decay promptly protects your investment and ensures that your outdoor space remains safe and functional for years ahead.
Regular Inspections Protect Your Investment
A sturdy, well-maintained deck adds beauty and function to any home, but wood rot can silently compromise its safety and integrity. Left unchecked, rotting wood weakens structural supports, creates hazardous surfaces, and leads to expensive repairs or complete replacement. Learning how to inspect your deck for wood rot empowers homeowners in Durham, CT to catch problems early, preserve their investment, and ensure their outdoor space remains safe for family and guests.
Wood rot develops when moisture, oxygen, and fungi combine to break down the cellulose in lumber. Connecticut’s humid summers and freeze-thaw cycles during winter create ideal conditions for decay, particularly in older decks or those built without proper drainage and ventilation. Regular inspections, ideally twice per year in spring and fall, help identify rot before it spreads, saving both money and the structural soundness of your deck.
What Causes Wood Rot and Where It Hides
Understanding why wood rot occurs helps you know where to look during inspections. Moisture is the primary culprit: water trapped against wood from poor drainage, ground contact, or damaged sealant allows fungi to colonize and digest the wood fibers. Areas that stay damp longer than 48 hours become prime targets for decay.
Common problem zones include:
- Ledger boards attached to the house, especially where flashing or caulk has failed
- Posts in direct contact with soil or concrete footings that hold moisture
- Joist ends near the ledger or rim joist where water can collect
- Deck boards with cracks or gaps that funnel water underneath
- Railings and balusters where horizontal surfaces trap rain and snow
- Areas shaded by trees or structures that never fully dry out
In Durham, decks built near wooded lots or beneath overhanging branches face heightened risk because leaves and debris trap moisture and block airflow. Similarly, decks without adequate slope or spacing between boards prevent water from draining, accelerating rot in the substructure.
Tools You Need for a Thorough Deck Inspection
Before you begin, gather a few simple tools that will help you detect both visible and hidden rot:
- Flathead screwdriver or awl for probing wood
- Flashlight or headlamp to illuminate dark areas beneath the deck
- Tape measure to check joist spacing and structural spans
- Camera or smartphone to document problem areas for reference
- Moisture meter (optional but helpful for detecting hidden dampness)
- Notebook to record findings and track changes over time
These tools allow you to move methodically through your inspection, probing suspicious spots and recording your observations. A moisture meter can reveal elevated readings even when wood looks dry on the surface, offering early warning of conditions favorable to rot.
Step-by-Step Visual Inspection Process
Step 1: Examine the Deck Surface and Boards
Start your inspection on the walking surface. Look for boards that appear discolored, warped, cracked, or spongy. Pay special attention to areas that receive heavy foot traffic or where water tends to pool after rain. Run your hand along the boards, soft spots, excessive splintering, or boards that flex more than their neighbors signal potential rot beneath the surface.
Use your screwdriver to gently probe any suspect boards. Healthy wood resists penetration and feels firm; rotted wood allows the tool to sink in easily, sometimes crumbling or breaking away. Mark problem boards with tape or chalk for repair or replacement.
Step 2: Inspect the Underside and Framing
Move beneath the deck with your flashlight. This is where rot often takes hold unnoticed because homeowners rarely see the joists, beams, and ledger board. Check each joist carefully, especially the ends where they meet the ledger or rim joist. Look for dark staining, fuzzy white or brown fungal growth, or wood that appears soft or crumbly.
Probe joist ends and any areas that show discoloration. Water damage often appears as darker streaks running with the grain, while active rot may present as powdery residue or a musty odor. Check fasteners and joist hangers for rust or corrosion, which indicates prolonged moisture exposure and often accompanies wood decay nearby.
Step 3: Assess the Ledger Board and Flashing
The ledger board, the horizontal beam bolted to your house, is one of the most critical structural elements and a common rot site. Inspect the connection points between the ledger and siding, looking for gaps, missing caulk, or damaged flashing that allows water to seep behind the board.
Probe along the top and bottom edges of the ledger. If water has infiltrated, you may find soft wood, gaps between the ledger and house, or signs that fasteners have loosened. Because ledger failure can cause catastrophic deck collapse, any evidence of rot here demands immediate attention from experienced deck contractors.
Step 4: Check Posts and Footings
Examine each support post from top to bottom. Posts set directly in soil or concrete are especially vulnerable because ground moisture wicks into the end grain. Look for discoloration, cracks, or soft spots at the base. Probe the bottom six inches of each post thoroughly, as decay often starts where wood meets concrete or dirt.
If your posts sit on concrete piers, check that they rest on proper post bases that elevate the wood above the concrete surface. Posts in direct contact with concrete absorb moisture through capillary action, promoting rot even when the concrete appears dry.
Step 5: Inspect Railings and Balusters
Railings endure constant exposure to weather and often show rot sooner than the deck structure. Check the top rail where water sits after rain, and examine the connection points where balusters attach to the rail and deck. Horizontal surfaces and joints trap moisture, creating perfect conditions for fungal growth.
Probe areas where fasteners penetrate the wood, as these holes can admit water into the end grain. Also inspect the bottom rail and any decorative elements that might collect debris or block drainage. Loose railings or balusters that wobble may indicate hidden rot in the attachment points.
Identifying Different Stages and Types of Rot
Not all wood decay looks the same. Understanding the common types helps you assess severity:
Brown Rot: Also called dry rot, this type breaks wood into cube-like pieces and appears brown or tan. It attacks the cellulose, leaving wood brittle and prone to collapse under load. Brown rot progresses rapidly once established.
White Rot: This decay appears lighter in color and leaves wood soft and stringy or spongy. It breaks down both cellulose and lignin, making the wood feel fibrous and weak.
Soft Rot: Slower to develop, soft rot creates shallow cavities on the wood surface and often appears in conditions of extreme moisture. It may look like surface checking or small cracks but extends deeper than cosmetic damage.
Early-stage rot may show only as discoloration or slight softness. Advanced rot produces visible fungal growth, crumbling wood, and structural weakness. Catching decay in its early stages allows for targeted repairs rather than wholesale replacement, saving significant expense.
When to Call in Professional Deck Contractors
While regular homeowner inspections catch many issues, some situations require the expertise of professional deck contractors. If you discover rot in load-bearing members, ledger boards, main beams, joists, or posts, do not attempt repairs without professional evaluation. These elements support the entire structure, and improper fixes can result in dangerous failures.
Similarly, if rot is widespread, affecting multiple joists or large sections of the deck, a contractor can assess whether selective repairs will suffice or if replacement makes more sense. Professionals also understand local building codes and can ensure repairs meet current standards for fasteners, flashing, and structural connections.
When you need thorough assessment and high-quality repairs, working with experienced contractors ensures your deck remains safe and code-compliant. Professionals bring specialized tools, knowledge of wood species and treatments, and the ability to identify hidden damage that might escape a homeowner’s inspection.
Preventing Wood Rot Through Maintenance
Prevention is far easier and less expensive than repair. After completing your inspection and addressing any rot, implement these maintenance practices to protect your deck:
- Clean the deck surface and between boards twice yearly to remove debris that traps moisture
- Apply a quality water-repellent sealer every two to three years, or as the manufacturer recommends
- Trim back vegetation that shades the deck or deposits leaves and needles
- Ensure proper drainage away from the deck structure
- Check and maintain flashing and caulk around the ledger board annually
- Elevate planters, grills, and furniture periodically to allow the wood beneath to dry
- Inspect and clear gaps between deck boards to prevent debris buildup
In Connecticut’s climate, these steps significantly extend deck life. Spring cleaning removes winter debris and allows you to inspect for damage from freeze-thaw cycles, while fall maintenance prepares the deck for winter weather.
Repair Versus Replacement: Making the Right Choice
Once you identify rot, the next decision is whether to repair or replace. Small areas of surface rot in deck boards can often be cut out and replaced with new lumber, especially if caught early. Isolated damage to a single joist or railing section may also be repairable.
However, widespread rot, especially in structural members, often signals that the deck has reached the end of its serviceable life. If multiple joists show decay, the ledger is compromised, or posts have rotted at the base, replacement may be the safer and more cost-effective long-term solution.
For homeowners considering replacement, composite decking offers a rot-resistant alternative that maintains its appearance and structural integrity far longer than wood. Modern composite materials resist moisture, insects, and decay while requiring minimal maintenance, an attractive option for those who want lasting outdoor living space without the upkeep demands of traditional lumber.
Building Codes and Safety Standards
Deck safety is not just about appearance; it is about protecting everyone who uses the structure. Connecticut building codes specify requirements for joist sizing, fastener types, ledger connections, and railing height to ensure decks can safely support intended loads.
When rot compromises structural elements, the deck may no longer meet code requirements even if it appears stable. During repairs or replacement, contractors verify that all work complies with current standards, which may have changed since the original construction. This compliance protects homeowners from liability and ensures the deck will pass inspection if the home is sold.
Local Considerations for Durham, CT Homeowners
Durham’s location in central Connecticut subjects decks to the full range of New England weather: humid summers, cold winters with freeze-thaw cycles, and ample precipitation year-round. These conditions accelerate wood deterioration, particularly in decks built from pressure-treated pine or other softwoods.
Older decks in the area, those built fifteen or twenty years ago, often used lumber and fasteners that do not match current standards for rot resistance and structural performance. Galvanized nails and screws from that era corrode faster, and lumber treatments have improved significantly. Homeowners with aging decks should inspect vigilantly and consider upgrading to more durable materials when replacement becomes necessary.
Additionally, properties near wooded areas or with mature trees overhead face greater rot risk due to persistent shade and organic debris. These sites benefit from more frequent inspections and aggressive debris removal to keep the deck dry.
Why Choose Experienced Professionals for Deck Work
Quality deck construction and repair demand more than basic carpentry skills. Proper flashing installation, correct fastener selection, appropriate joist span calculations, and thorough moisture barriers separate safe, durable decks from those prone to premature failure. Working with seasoned professionals ensures these details receive the attention they deserve.
For homeowners throughout Durham and surrounding communities, skilled craftsmanship and attention to detail make the difference between a deck that lasts decades and one that requires costly intervention after just a few years. When inspection reveals issues beyond simple board replacement, consulting with experienced contractors provides peace of mind that repairs or replacement will be done right.
Take Action to Protect Your Outdoor Investment
Your deck represents a significant investment in your home’s livability and value. Regular inspections, prompt repairs, and preventive maintenance keep that investment sound and your outdoor space safe. If your inspection uncovers rot or raises concerns about structural integrity, do not delay addressing the problem, wood decay progresses quickly, and early intervention prevents more extensive damage.
Whether you need expert assessment, targeted repairs, or complete deck replacement with modern, rot-resistant materials, professional guidance ensures your project meets the highest standards. Reach out to discuss your deck inspection findings, explore your options, and schedule a consultation to restore safety and beauty to your outdoor living area.